• Skip to primary navigation
  • Skip to main content
  • Skip to primary sidebar
  • Skip to footer
  • Home
  • Blog
  • Shop
  • Cart
  • My Account

Flosstyle

Practical PDF Sewing Patterns

in Behind the scenes· EZ Wrap Wallet· Flosstyle Patterns· Sew Along

Whoops!

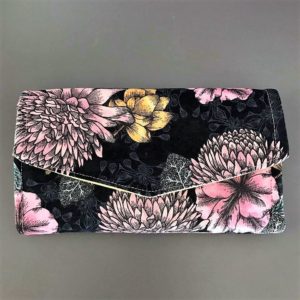
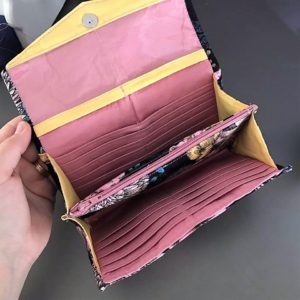
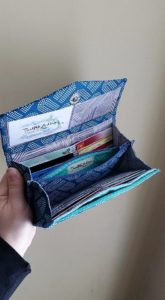
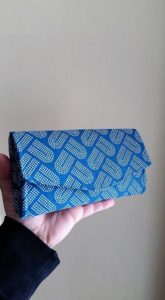
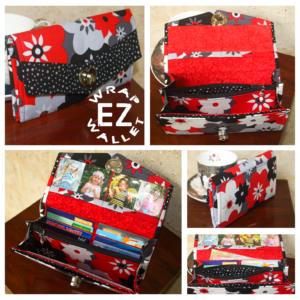
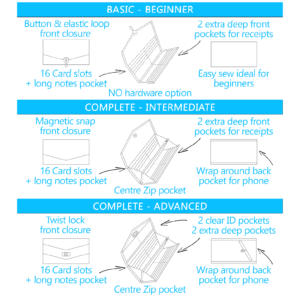
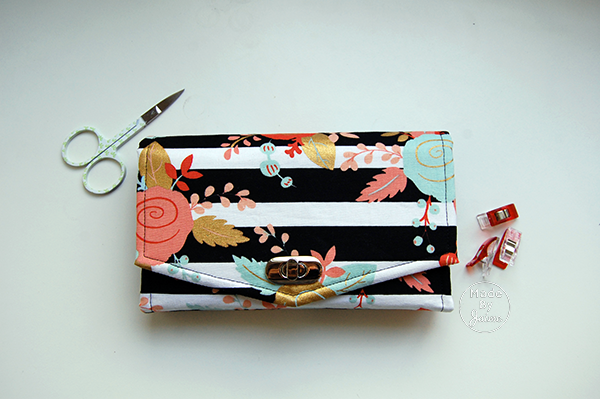
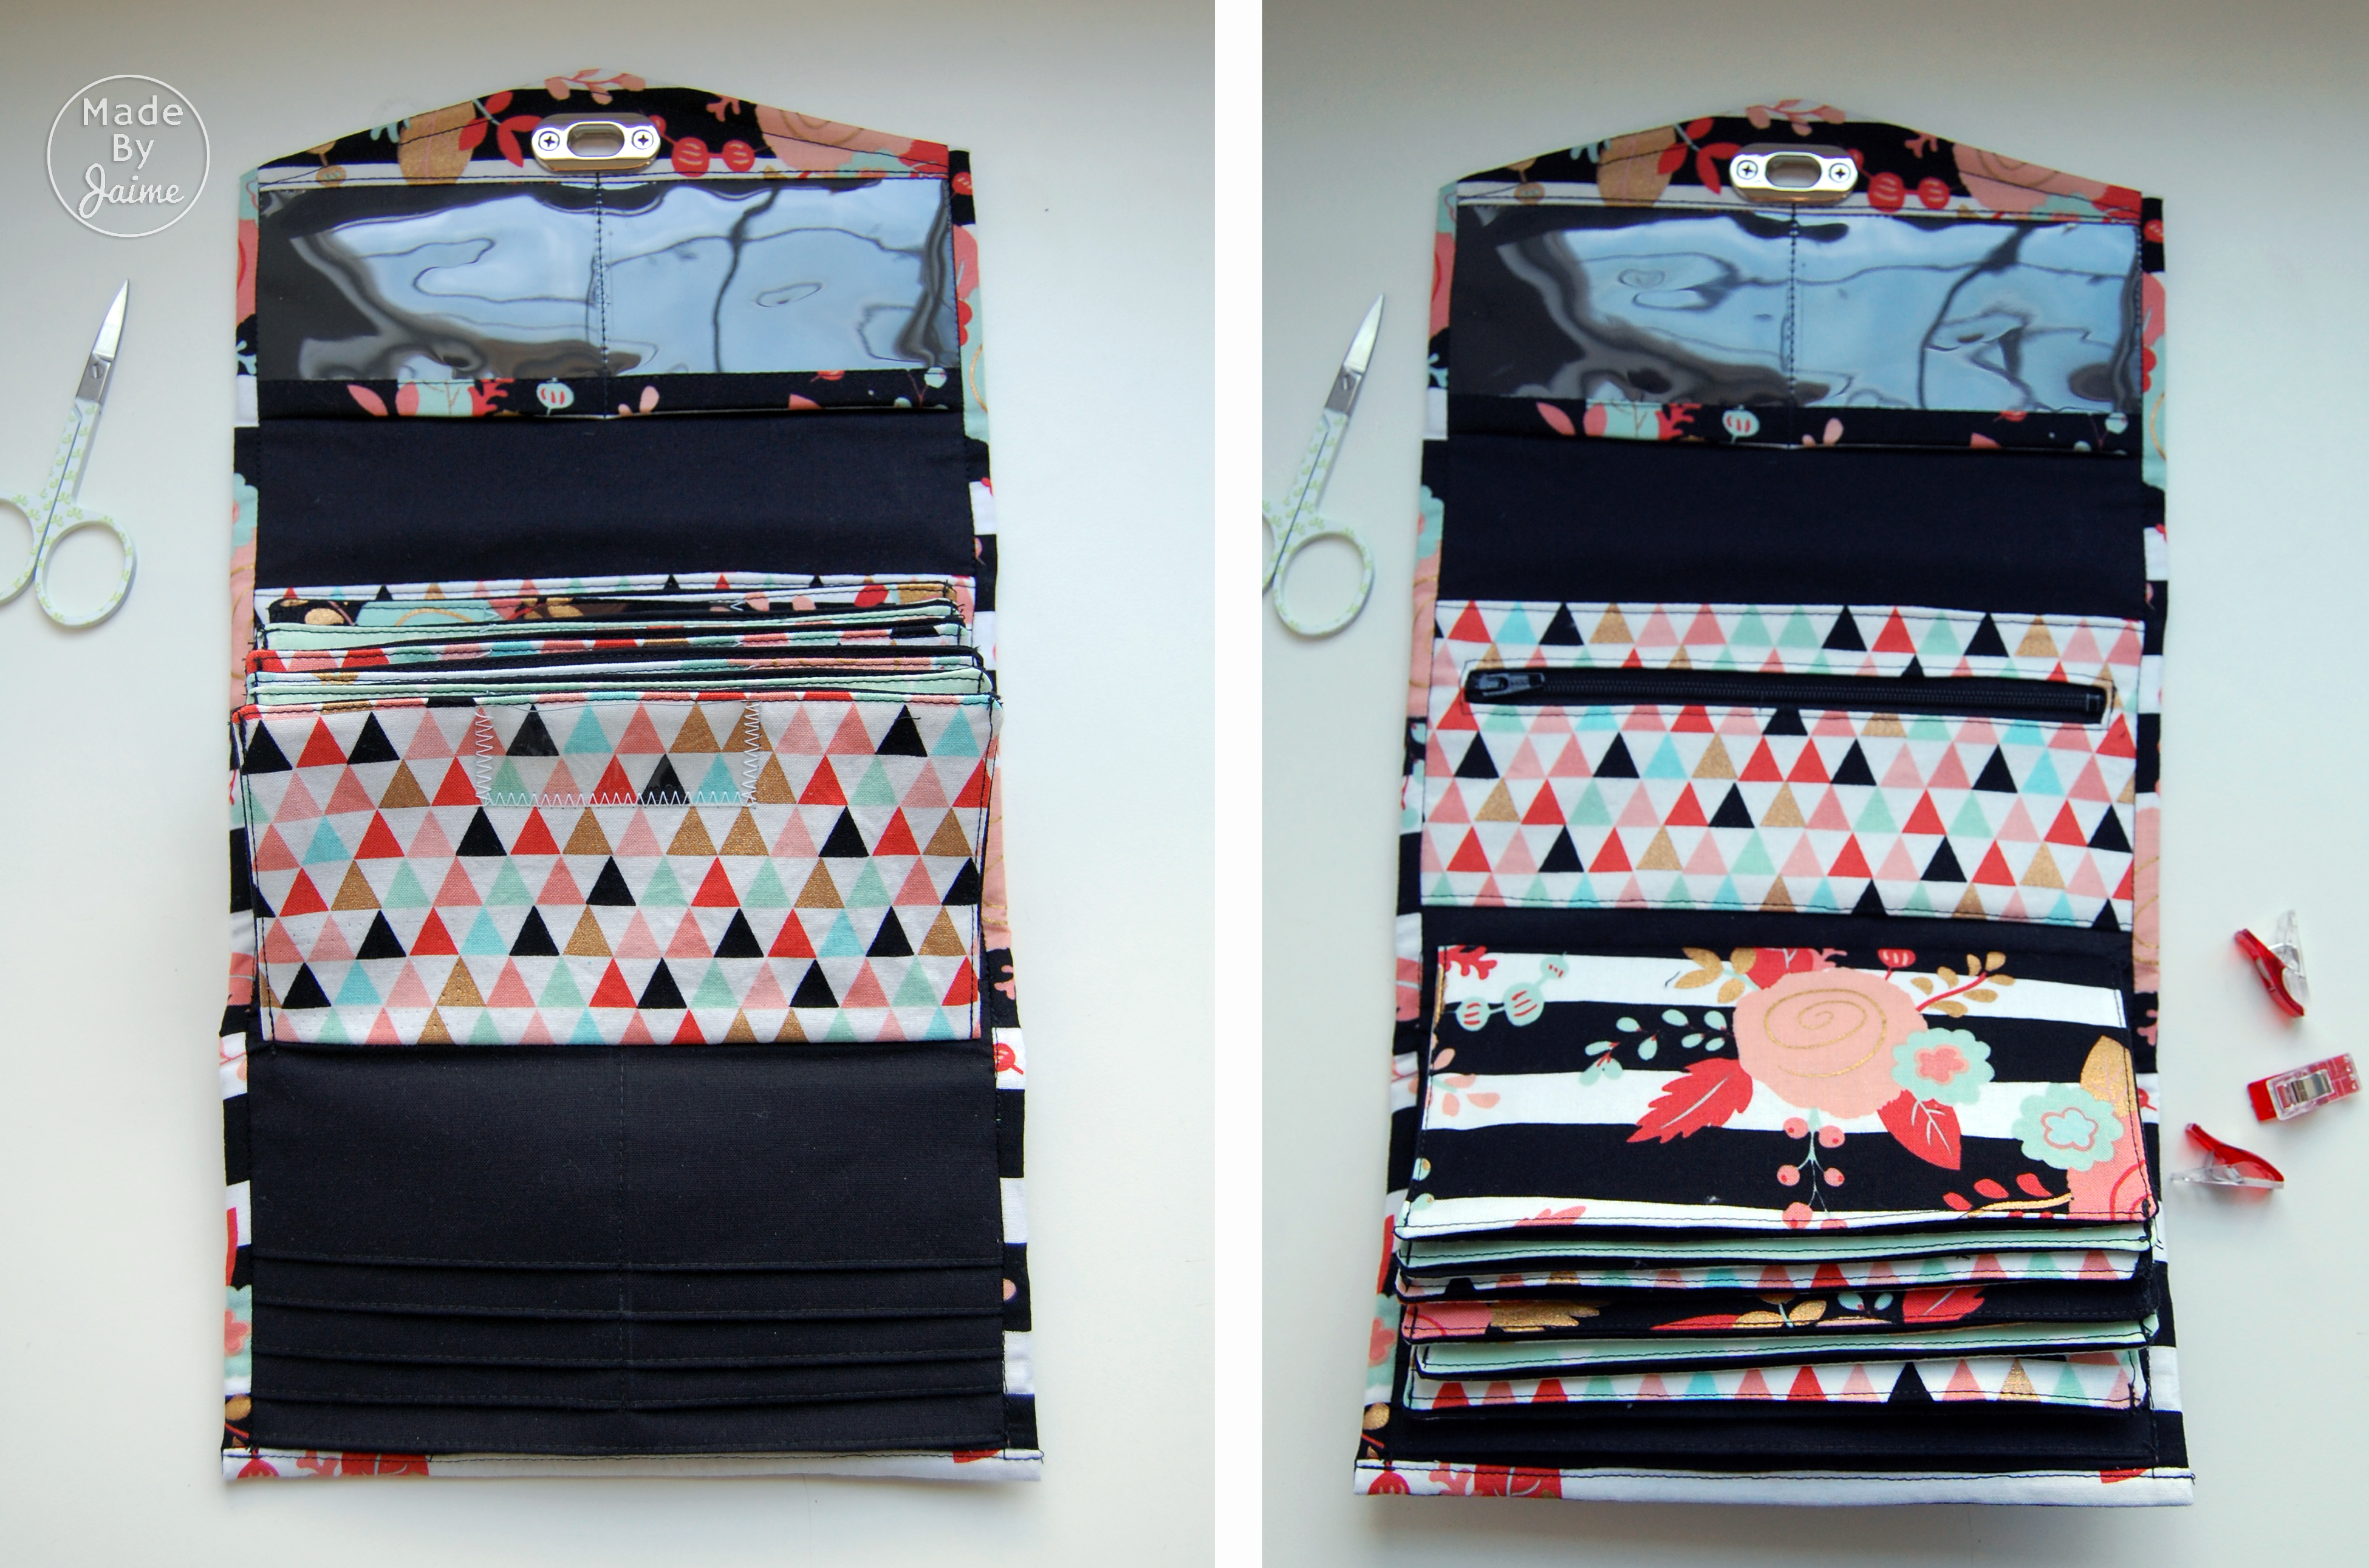
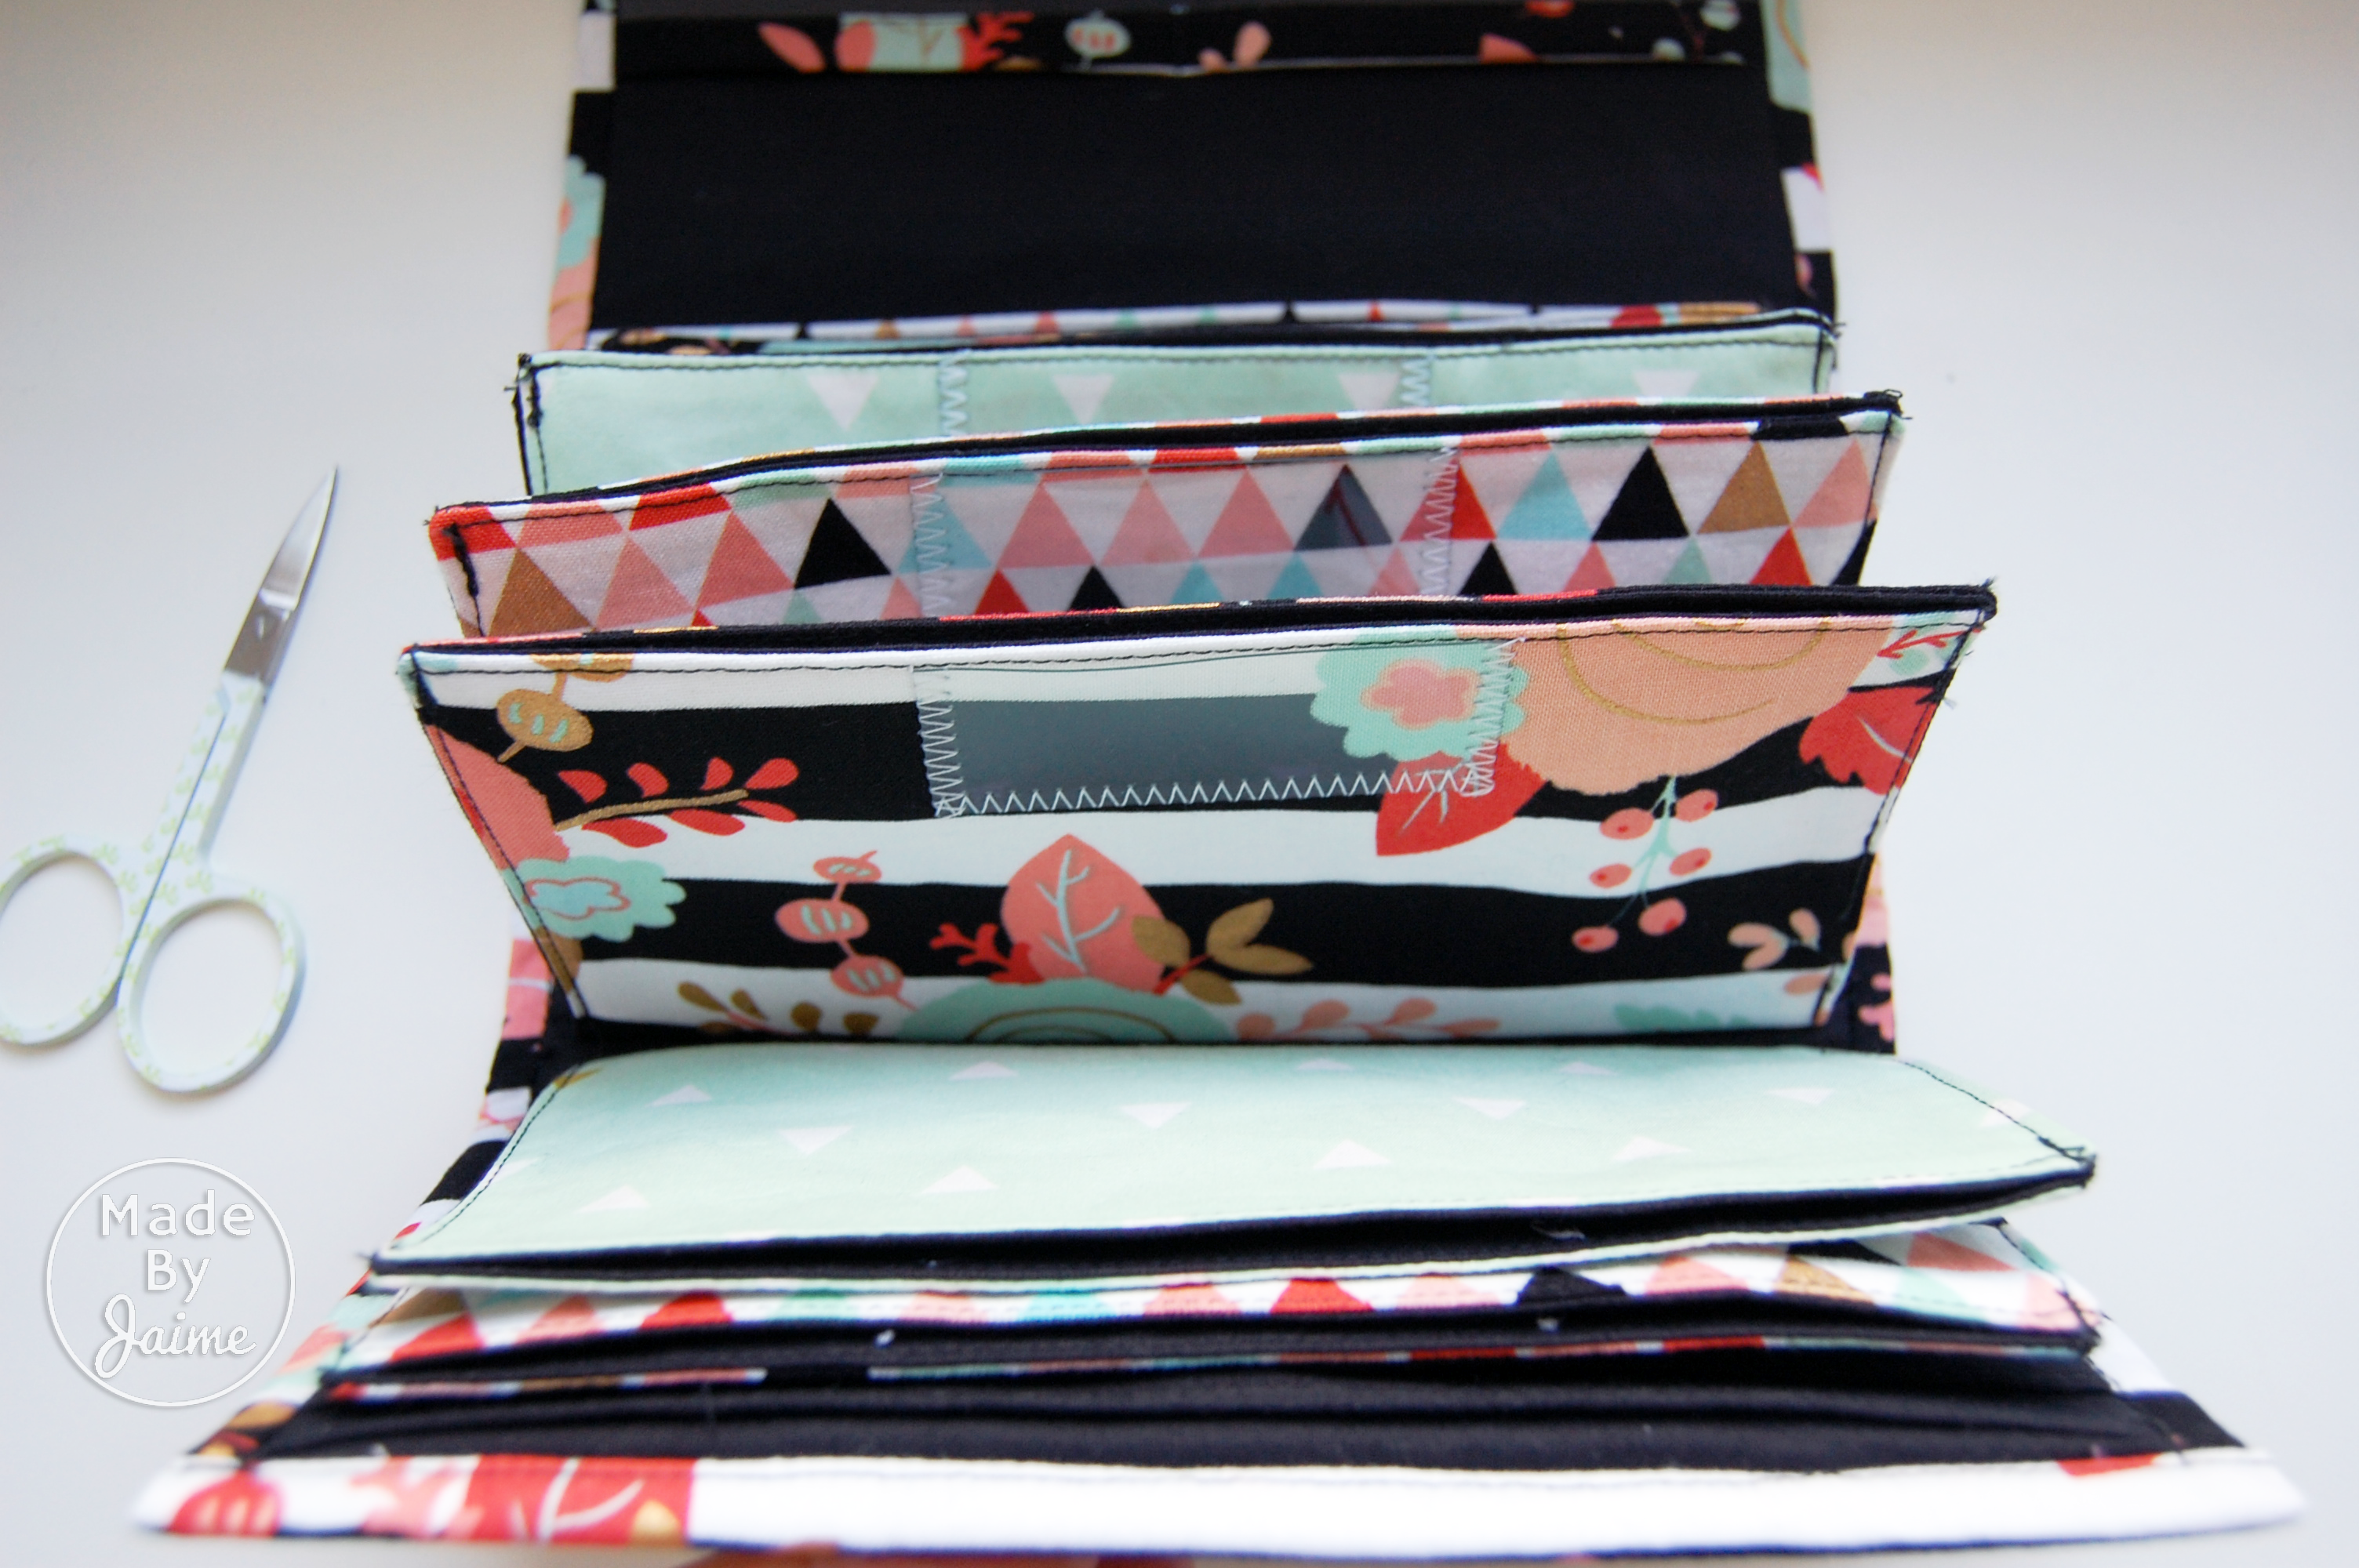
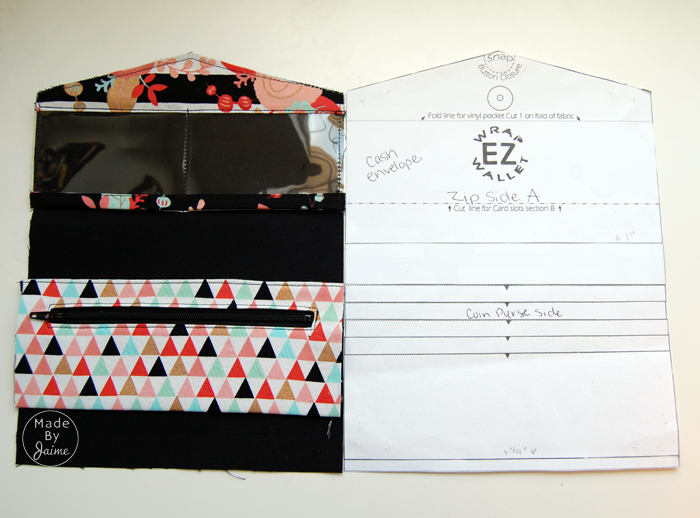
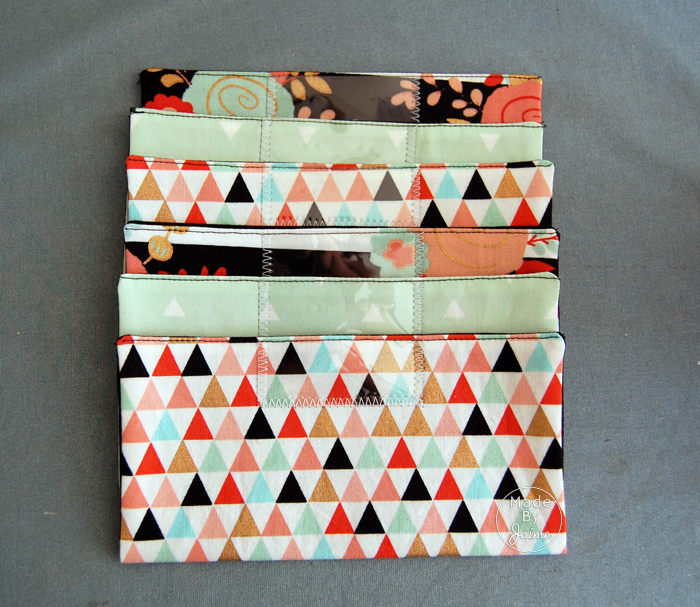
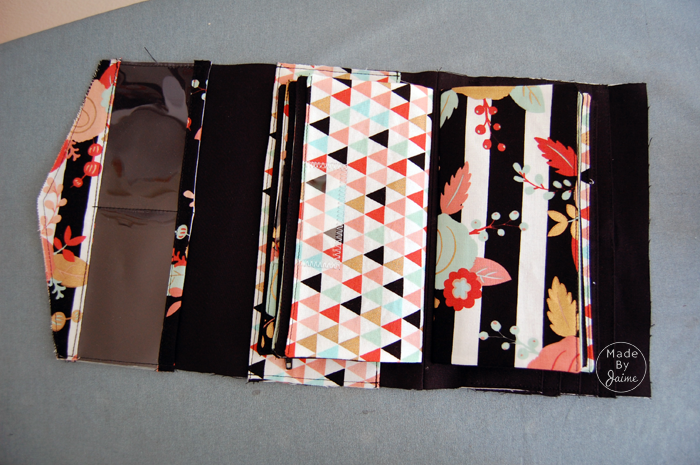
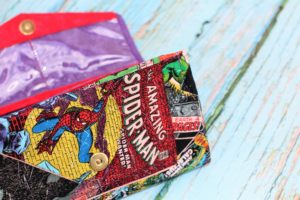
By now I think you all would have seen my finished wallet from the EZ Wrap Wallet Sew Along, how many of you noticed the purple patch that appeared after Day 4?

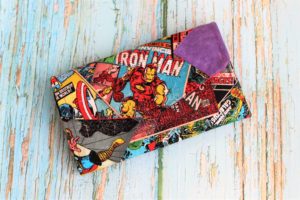
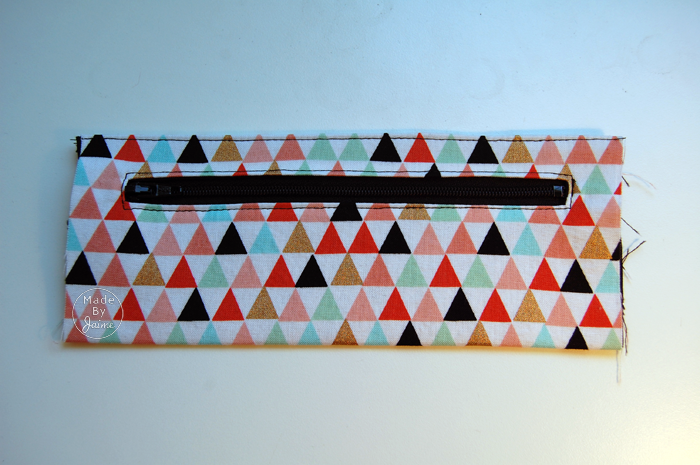
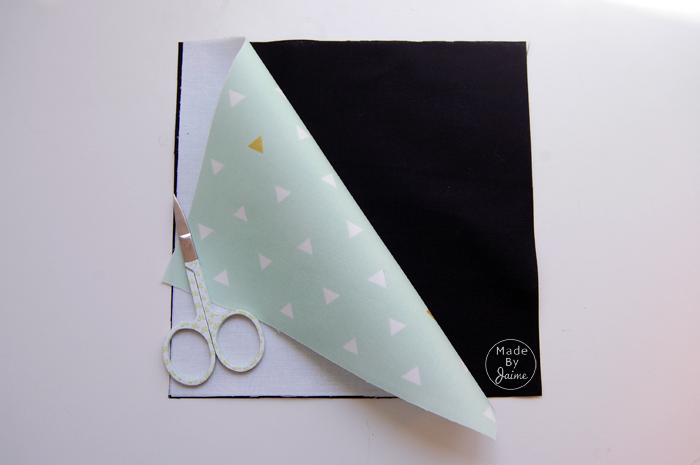
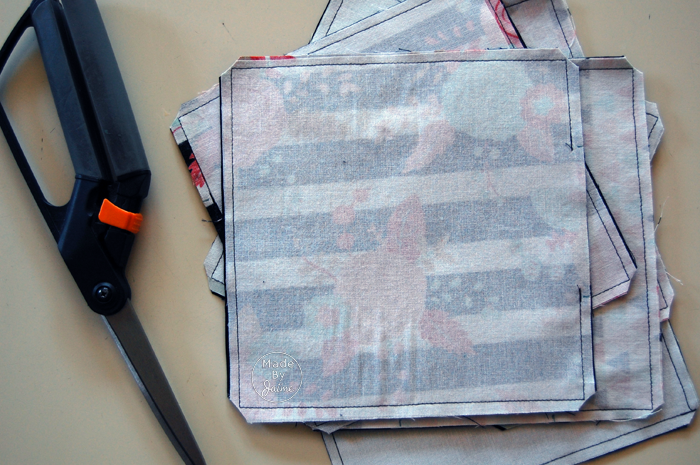
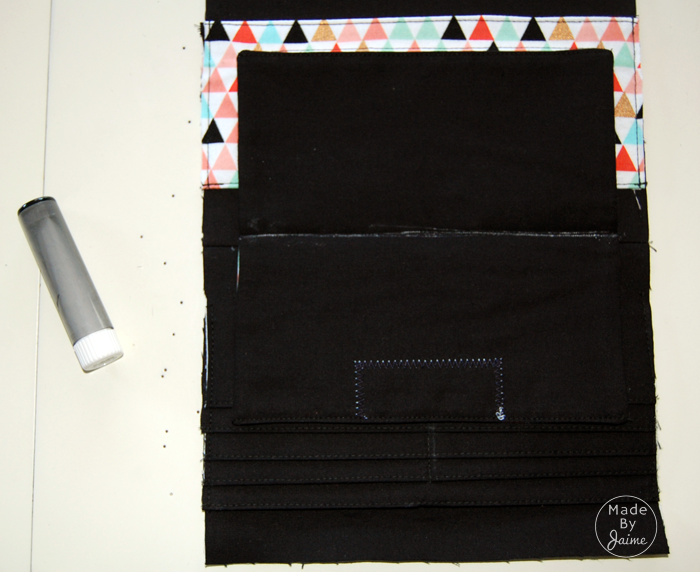
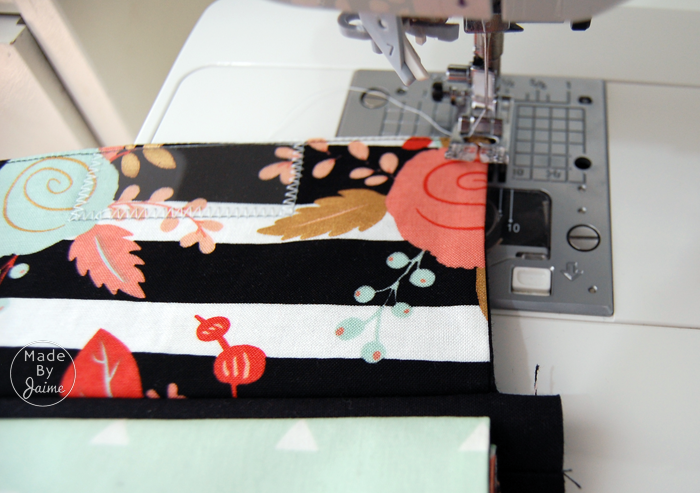
I had a little helper sitting on my lap (which isn’t unusual while I’m sewing, he likes to push the scissor button on the machine to cut the thread for me) and while I was cutting away my seam allowance after joining the outer to the card slots I accidentally cut into the corner of my outer. Normally I would have pulled it all apart and started again but because of the sew along I needed to get it finished. I unpicked just that corner, cut a purple patch big enough to cover it and put some vlisofix on the back of it to attach it to the outer and then sewed it in place. I then re attached the back to the outer and continued as normal.

I would prefer it without the patch, but it does add some character. If you haven’t shared photos of your finished wallet already I would love to see them. You can share them in the Flosstyle Fair Group or the EZ Wrap Group.


Happy Sewing xx

Filed Under: Behind the scenes, EZ Wrap Wallet, Flosstyle Patterns, Sew Along

in EZ Wrap Wallet· Flosstyle Patterns· Sew Along· Video

EZ Wrap Wallet Sew Along

Did you miss out on the EZ Wrap Sew Along? That’s okay you can find all the videos here to follow along anytime you want.

Pre-Video – Let’s get Ready

Day 1 – Interfacing and Cutting Out

Day 2 – Folding and Sewing the Cardslots

Day 3 – ID Pocket, Wrap and Zip Pocket

Day 4 – Attaching the Wrap

Day 5 – Finishing off and Top stitching


We had some wonderful submissions after the sew along, it makes me so happy to see all your amazing creations.


Our winners were:

  1. Ashley Corrine Clary‎
  2. Jo-Anne Payne
  3. Charlotte Huber

Here are some photos submitted during the sew along

Submitted by Megan Cooper

Submitted by Eraina Roberts


Submitted by Charlotte Hub


Submitted by Alanna Burtch

Want to see more photos, join the EZ Wrap Wallet Inspiration Group here.

Happy Sewing xx

Filed Under: EZ Wrap Wallet, Flosstyle Patterns, Sew Along, Video

in EZ Wrap Wallet· Flosstyle Patterns· Sew Along

EZ Wrap Sew Along

After the amazing response to the Bucket Hat Sew Along, we are running another video sew along! This time it’s the EZ Wrap Wallet!

The perfect chance to make something for yourself! The EZ Wrap Wallet has an option to suit everyone from beginner to advanced. There will be a daily video and blog post as well as heaps of pictures for you to follow along.


Important Details

Starts January 29th

You can get the pattern here.

Join the facebook event here.

And get ready to sew!!

Happy Sewing xx

Filed Under: EZ Wrap Wallet, Flosstyle Patterns, Sew Along Tagged With: Ez Wrap Sew Along, Flosstyle, Sew Along

in EZ Wrap Wallet· Flosstyle Patterns· Guest Blog Post· Pattern Hack

EZ Wrap Wallet – Cash Envelope Hack with Jaime

Hi Sewing & Crafty Friends – I’m Jaime from MadeByJaime.com. I’ve been making wallets for about two and a half years and after posting a few on Instagram, a friend made a request for a Cash System Wallet. Many who try to live on a cash budget separate out their paychecks into to real (or virtual) envelopes to make sure they only spend what they have available. Cash Envelope Wallets make it easier to carry your funds around while not confusing what budget category each dollar belongs to!

The wallet pattern I was primarily using to create wallets wasn’t conducive to holding the envelopes without obstructing their use, so I had to figure something else out. Just about that time, the EZ Wrap Wallet pattern was released and I knew it would be the perfect starting point for creating a Cash Envelope Wallet.

The Flosstyle EZ Wrap wallet already has a TON of options built into the pattern, but to convert it to a Cash Envelope Wallet, I decided to make some additions and omissions. Since most people living on a cash budget don’t generally have use for very many card slots, I decided to put card slots on only one side and use the other side of the wallet for a coin purse. After a lot of trial and error, I’m here to share my process from start to finish. If you don’t have the EZ Wrap Wallet Pattern, you can purchase a copy here.

Make a New Pattern Piece A: The first thing to do is to take pattern piece A (the pattern piece for the inside flap and card slots) and fold it all up along the lines. Tape the card slots in place and make a copy of the patter piece all folded up. This becomes your new pattern piece A.

To add some room for sewing then envelopes in place, add about 1/4″ to to the bottom of this piece. To make room in the flap to accommodate the new width required for the envelopes, you will also add 1/2″ to the pattern between the top of the card slots (I know the picture shows 1″, but I found that to be too much so I lessened it to 1/2″ and that seems good – feel free to play with this!). It is important to slice the pattern and add the 1/2″ above the card slots because we want to maintain the placement of the card slots on this piece to use as a guide for the coin/zipper pocket later.

Whatever you add to this piece, you also have to the interfacing pattern piece and the exterior pattern piece so be sure to add 3/4″ (1/2″+1/4″) to each one. It doesn’t matter where this 3/4″ goes on these pieces so just tack it on to the end with some paper scraps.

Flosstyle EZ Wrap Cash Envelope Wallet Hack | MadeByJaime

Cut Everything Out: Cut the pattern using your newly altered pieces and otherwise following the Basic EZ Wrap Wallet requirements.

In addition, you will need to cut your coin/zipper pocket, 8″ wide by 7″ tall. Using this measurement, cut one main and lining piece, as well as one piece of SF101.

You will also cut 6 envelopes 7 1/4″ square, along with 6 lining pieces & SF101 pieces the same size.

Flosstyle EZ Wrap Cash Envelope Wallet Hack | MadeByJaime

Fuse: After it’s all cut, fuse the interfacing to their corresponding pieces. This means, in addition to the pieces included in the pattern, you will be fusing the SF101 to the main coin/zipper pocket fabric, and the six SF101 pieces to the main envelope pieces.

Interior Flap & Zipper Pocket Construction: Make the ID slots on the inside flap according to the pattern instructions for the EZ Wrap Wallet. Next, make the coin/zipper pocket. Grab your outer coin/zipper pocket fabric & draw a 3/8″ box about 1″ down from one of the 8″ long edges. The end of the box should stop 3/4″ away from each side.

Flosstyle EZ Wrap Cash Envelope Wallet Hack | MadeByJaime

Open out the main pocket fabric and place it right sides together with the lining piece. Make sure all edges are aligned and sew, with a small stitch length, around that box, back stitching at beginning and end and making sure your corners are nice and crisp. Using a pair of sharp scissors, cut down the center of this box to about 1/4″ from each end, then clip to corners, as close as possible without clipping the stitches.

Flosstyle EZ Wrap Cash Envelope Wallet Hack | MadeByJaime

Turn the lining to the back side, making sure to pull all the lining fabric to the back and press. Now you have the “window” for your zipper!

Flosstyle EZ Wrap Cash Envelope Wallet Hack | MadeByJaime

Take your zipper, placing the zipper stop at one edge of the “window” and pulling the zipper pull so that it just reaches the other edge of the “window”. Pin, use double sided tape or glue to hold the zipper in place and stitch very close to the edge all the way around your “window”.

Flosstyle EZ Wrap Cash Envelope Wallet Hack | MadeByJaime

Trim any excess zipper. Also, fold your main fabric out of the way and trim the lining about 1/4″ off the bottom 8″ edge. I recommend doing this to reduce the excess fabric created & so that the lining will lay nicely when you fold the whole unit in half later.

Flosstyle EZ Wrap Cash Envelope Wallet Hack | MadeByJaime

Fold your zipper unit in half, right sides together, bringing all 8″ raw edges together (main and lining) and sew 1/4″ seam.

Flosstyle EZ Wrap Cash Envelope Wallet Hack | MadeByJaime

Flip the whole unit inside out. Press your seam at the top and then press the fold into the bottom. Top stitch along the top edge.

Flosstyle EZ Wrap Cash Envelope Wallet Hack | MadeByJaime

Grab your inside flap piece (A) and the pattern piece we used to cut it and line up the coin pocket along the same place the card slots would be if we had made those instead.

Flosstyle EZ Wrap Cash Envelope Wallet Hack | MadeByJaime

Pin or clip in place and stitch down along sides and bottom.

Flosstyle EZ Wrap Cash Envelope Wallet Hack | MadeByJaime

Remaining Interior Construction: Create the bottom part of the wallet with card slots and attach to the coin pocket/inside flap unit, according to the pattern instructions.

Envelope Construction: The method that produces the best result in my opinion is the one I found at just*imagine*heaven blog. To make your envelopes, do exactly as she explains…

Flosstyle EZ Wrap Cash Envelope Wallet Hack | MadeByJaime

Flosstyle EZ Wrap Cash Envelope Wallet Hack | MadeByJaime

Flosstyle EZ Wrap Cash Envelope Wallet Hack | MadeByJaime

…except before closing the sides, use a zig zag stitch to sew a 1″x 2.5″ piece of clear vinyl to the center top of each envelope to provide a place for your category name. I like to use my Teflon foot for this, but you can place scotch tape on the bottom of your standard foot to make it more slippery if you don’t have a Teflon foot.

Flosstyle EZ Wrap Cash Envelope Wallet Hack | MadeByJaime

Flosstyle EZ Wrap Cash Envelope Wallet Hack | MadeByJaime

Flosstyle EZ Wrap Cash Envelope Wallet Hack | MadeByJaime

Open up one envelope and center it in the wallet interior so that the fold is about 1/8″ away from the bottom of the coin pocket. Stitch in place down the center of the fold.

Flosstyle EZ Wrap Cash Envelope Wallet Hack | MadeByJaime

Repeat with all envelopes, placing each one about 1/8″ away from the next. Sometimes I start from the middle and work my way out, other times I sew the first and last one (just below the card slots) and then space the rest evenly between.

To close the envelopes, pull each envelope front and back together, allowing the rest of the wallet to fall away. Stitch up each side 1/8″ from the edge, starting at the top, back stitching and sewing down as far as your machine will allow.

Flosstyle EZ Wrap Cash Envelope Wallet Hack | MadeByJaime

As long as you get slightly less than a dime’s width away you should be good to go, but most of the time you should be able to stitch all the way to the fold. Back stitch at the end too and your interior is finished!

Flosstyle EZ Wrap Cash Envelope Wallet Hack | MadeByJaime

Final Construction Notes: Finish as instructed for the basic version of the EZ Wrap wallet. I will admit, it takes a little bit of finagling to get around the bulk of the envelopes, but it can be done. Just use lots of pins and go slow. I also fold three envelopes one direction and three the other to try to distribute the bulk.

I’ve gone back and asked customers about their envelopes not having closures (zipper, button, velcro, etc.) and everyone has reported back that all seems to be secure and they’ve had no issues with anything falling out.

I hope this is helpful to you! If you have any questions or anything is unclear, feel free to comment and I will do my best to clarify! If you don’t have the EZ Wrap Wallet pattern, you can grab it here!

And I’d love it if you came to see me at MadeByJaime.com, or on Facebook and Instagram too!

Flosstyle EZ Wrap Cash Envelope Wallet Hack | MadeByJaime

Filed Under: EZ Wrap Wallet, Flosstyle Patterns, Guest Blog Post, Pattern Hack

Primary Sidebar

Recent Posts

  • Sewing for loved ones March 21, 2022
  • Sewing Challenge 2022 – Week 4 January 30, 2022
  • Sewing Challenge 2022 – Week 2 January 15, 2022
  • Scrub Cap Sew Along January 14, 2022
  • Sewing Challenge 2022 – Week 1 January 7, 2022

Categories

  • 2019 52 Week Sewing Challenge
  • 52 Week Sewing Challange
  • 52 Week Sewing Challenge – 2020
  • 52 Week Sewing Challenge – 2022
  • Alice's Tea Set
  • Applique
  • Artiste
  • Arts and Crafts
  • Babys First Toys
  • Bazinga Backpack
  • Beginners
  • Behind the scenes
  • Blogs by Jess
  • Blogs by Olivia
  • Bloomies
  • Bolster Bean Bag
  • Bonnet
  • Boutique and Hybrid Bibs
  • Bunny Bucket
  • Bunny Bucket Crown
  • Capsule Wardrobe
  • Charity Cape
  • Christmas Sewing
  • Costumes
  • EZ Wrap Wallet
  • Flosstyle Patterns
  • Free Downloads
  • Freebies
  • Groovy Guys Wallet
  • Guest Blog Post
  • How To
  • Hunter Shorts
  • Itty Bitty
  • Kanga Carrier
  • Learn to Sew
  • New to PDF Patterns
  • One Yard Tote
  • Paradise Dress
  • Pattern Hack
  • Pattern Release
  • Play Away
  • Printable
  • Puckers
  • Rainbow Hat
  • Scrub Cap
  • Sew Along
  • Sew For kids
  • Sewing
  • Sewing for Baby
  • Sewing for Boys
  • Sewing Groups
  • Sewing with Braden
  • Sewing with Kids
  • Sneak Peek Stocking
  • Souffle Skirt
  • Spring Wardrobe Challenge
  • Sprouts
  • Star Shorts
  • Super Suit
  • Things to do with the Kids
  • Tidy Travel Tote
  • Timelapse
  • Tooshies
  • Trees
  • Trolley Liner
  • TTT
  • Tutorials
  • Twiggies
  • Twigs
  • Ultimate Bucket Hat
  • Uncategorized
  • Upcycle
  • Upcycle Challenge 2018
  • Ventura Lite
  • Video
  • Whirl Skirt
  • Zoo

Footer

Product categories

  • Pattern Workshop
  • Patterns
    • Accessories
    • Babies
    • Baby Carrier
    • Bags
    • Boys
    • Free
    • Gifts and Toys
    • Girls
    • Home Decor
    • Ladies
    • Men
    • Wallets and Bags
  • Uncategorised

New to the Blog

  • Sewing for loved ones
  • Sewing Challenge 2022 – Week 4
  • Sewing Challenge 2022 – Week 2
  • Scrub Cap Sew Along
  • Sewing Challenge 2022 – Week 1

Search

  • About Us
  • Free Patterns
  • Downloads
  • Privacy
  • FAQ’s

Flosstyle Patterns · Copyright © 2023

Copyright © 2023 · Ellie Jane on Genesis Framework · WordPress · Log in