• Skip to primary navigation
  • Skip to main content
  • Skip to primary sidebar
  • Skip to footer
  • Home
  • Blog
  • Shop
  • Cart
  • My Account

Flosstyle

Practical PDF Sewing Patterns

in Beginners· Blogs by Olivia· Free Downloads· Learn to Sew· New to PDF Patterns· Sewing

Why you need to start using PDF patterns for sewing!

PDF patterns are a godsend for sewers. They allow you to print out a sewing pattern and use it to sew a project all within a short span of time. They may seem complicated and difficult to prepare at first, but this blog post will outline why they are a must have in your sewing process.

A little bit about PDF patterns

A PDF pattern isn’t as out there as you may think, they are, put simply, just a digital version of a printed pattern. You can find PDF patterns online on any sewing website (or similar). They are downloadable and you can save them on to your computer and print them off on regular printing paper using your household printer. If it is a large print, all you need to do is sticky tape them together! This means that through using PDF patterns you will be able to find a pattern you love and begin working on it the exact same day. This saves you from the days of waiting to get a printed pattern.

Why are PDF patterns so great?

Instant sewing

The main benefit to PDF patterns for most sewers is the fact that they can begin sewing as soon as they find a pattern they like. This also saves money as there are many free downloadable PDF patterns and shipping is no longer a cost that you need to factor in. This way, people like us can hold on to that excitement we feel when we find the perfect pattern. This will allow for the initial excitement to last all the way up to the commencement of sewing!

Accessibility

Using a PDF pattern will also mean that you will be able to find, and use, unique patterns from all around the world. There are so many small stores on the internet who sell great PDF patterns that you wouldn’t be able to find anywhere else. This will mean that you will be able to sew unique designs without the fear of running into someone with the same piece whilst being proud of the individuality of your creation. Small stores are also great at producing patterns which cater for a range of different body shapes and sizes, meaning that you will be able to create a well fitting piece without having to make your own adjustments. Overall, the accessibility of PDF patterns brings so many great benefits that will allow you to create your perfect piece.

How to use a PDF sewing pattern

Downloading the pattern

The first thing you need to do when using a PDF pattern is to find one that you love. PDF patterns are all over the internet so spend time browsing to find one you really love. Once you’ve done this, purchase the pattern and download it as a PDF file on your computer. Once you have downloaded your pattern, you will have to locate the file to use it. You will be able to find it in the recent downloads section of your computer.

Printing the pattern

Once you have opened your file, you then have to print out your pattern. All this requires is printing out the sheets you have downloaded with your home printer (if you have one). When printing, you must ensure that the scale is set to 100% so the pattern is printed ‘to scale.’ If you don’t have a home printer, you can take these PDFs on a USB to a printing store such as Office-works and receive your pattern like this. The PDF pattern will be spread out over many different sheets, which, when printed can be put together and combined to create a large pattern.

Assembling the pattern

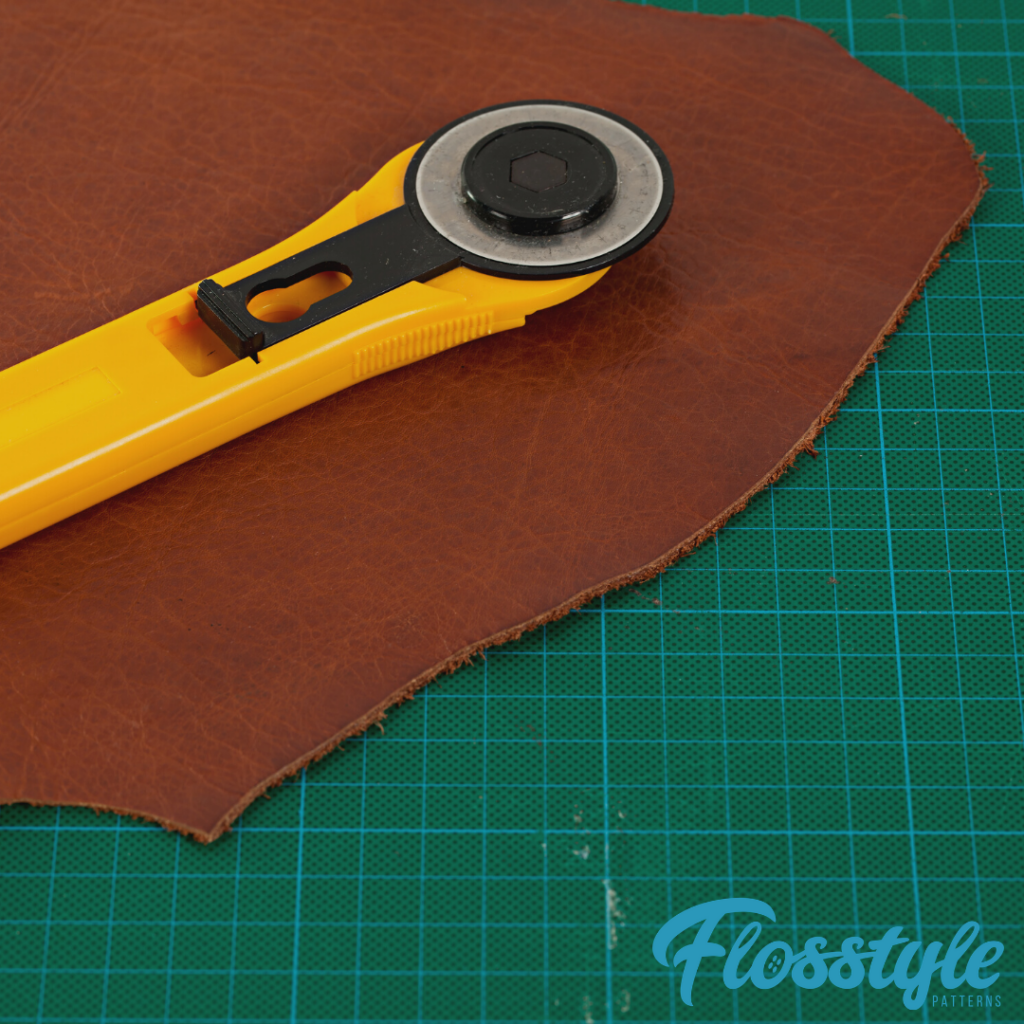
Most PDF patterns will have margins on each side of the PDF. In order to properly assemble the pattern, you must trim off the edges of each page. To save time, you can invest in a cutter which quickly cuts straight lines across pages, some will even allow you to cut through multiple pages at a time which is super handy!

Once you have trimmed the pattern pages down, you can start to assemble the pattern. The best thing to do is lay out the pattern flat first through discovering which pages fit next to one another. Patterns are generally number or letter coordinated, allowing you to easily locate the pages which fit next to one another. Once you have the pages properly laid out, tape or glue the pages together to ensure that they are being held in place properly.

The final step to assembly is to wait until the glue is dried (if you used glue) and cut out all of the pieces, just as you would for any other pattern.

The final step: sewing

Once all of the pieces have been cut out and assembled, the final step is to begin your sewing.. the most exciting part! There is nothing complex about this step if you’re a regular sewer, you treat these PDF patterns as any other pattern.

Trying out PDF patterns is essential for every sewer. Here at Flosstyle, we deem PDF patterns to be life-changing. Not only do they come with so many benefits, but they are also so easy to use. Trust us when we tell you, PDF sewing patterns will undoubtedly change your life. Make sure to give PDF patterns a go, and let us know how you feel about them!

Happy sewing!

Olivia B

Filed Under: Beginners, Blogs by Olivia, Free Downloads, Learn to Sew, New to PDF Patterns, Sewing

in Beginners· Blogs by Jess· Learn to Sew

Learn to Sew Part 2 – Sewing Machine Buyers Guide

Buying a sewing machine can be an extremely daunting task, especially for a beginner (hey, it’s daunting even for those who have been sewing for decades!). Rather than providing you with a list of sewing machines to pick from, this guide will outline what to look for when you go sewing machine shopping. If you haven’t already, be sure to read part 1 of our learn to sew series so you know the tools of the trade you need to get you started on your sewing journey. 

We will now go through the features to look out for, and some other options you might like to consider.

Cost 

First things first, sewing machines can be super expensive. You don’t have to spend a lot of money to get a good machine: you don’t even need to buy a brand new machine. These days there are so many second hand options available online on places like eBay and Facebook Marketplace. A benefit of buying a second hand machine is that the person selling it to you will likely give you a quick lesson in how to use it. So not only will you save some money, you will also be set up and ready to go quicker! On the subject of saving money, a machine with basic features might be okay for you now as a beginner, but you won’t be a beginner forever! You might be better off financially to buy a more expensive machine with more features rather than having to upgrade your machine in a year or two down the track.

Stitches 

What stitches does the machine come with? When looking at this, it is important to remember quality over quantity. Some machines come with 100’s of different stitches, and you will realistically only use about 5 of them! You will want to make sure your machine includes the common stitches (straight stitch and zig zag stitch are the ones I use the most), but also, the most common stitches you will use in the projects you want to undertake. It could be worth your while to have a look through the Flosstyle Shop and buy some of the patterns you would like to make when you get your machine and have learnt the basics. Each item in our shop has a skill level rating, and we have a range of free patterns too.  

We would also recommend steering clear of machines that do not allow you to change the length and width of stitches. Most basic machines come with all the basic stitches you could need, but they may not allow you to change the size or width of the stitches, which can cause trouble with future projects you may undertake. 

Drop-in VS front-loading bobbin

A bobbin is a spherical item that thread is wound on. A bobbin is used in your sewing machine is placed in the bottom part of the machine. Sewing machines differ in how the bobbin is placed in the machine. A sewing machine can have either a drop-in or front-loading bobbin. 

A drop-in bobbin (also known as top loading bobbin) is placed in the sewing machine from the top of the sewing area. In most drop-in bobbins, you will need to remove a small plastic cover, place the bobbin in, put the thread in place, and then put the cover back on.  A front-loading bobbin (also known as a bottom loading bobbin) is placed in the machine through a door in front of the needle area, that is actually removed from the machine. The bobbin will need to be put in place, the thread placed through a small groove, and then placed back into the machine. With front-loading bobbins you need to ensure the thread and bobbin remains properly aligned when putting it back into the machine. 

For beginners, we recommend a drop-in bobbin, as it’s much easier to use (which you probably already decided for yourself after reading the descriptions above). It’s also worth noting that the majority of modern sewing machines come with drop-in bobbins. Front-loading bobbins are a lot more fiddly and finicky than drop-in bobbins. Some sewers even consider front-loading bobbins “out-dated”. 

Needle threader 

A needle threader is a must for me, because I am absolutely hopeless at threading a needle without one. However, my mum can thread a needle in a millisecond with no hassles at all. If you’re a beginner with no sewing machine, I would recommend getting a sewing machine with a needle threader. If you have a bit of experience and know you can thread a needle with ease, you can give this one a miss. Once again, it comes down to personal preferences (you will read that a lot throughout this post… sorry, but it’s an important reminder!). 

Instructions and guides 

Now this is super important if you’re a beginner, and especially if this is your first ever sewing machine. When you get home, who will help you use the machine? Some machines come with booklets, DVD’s, and some brands even have YouTube channels with step-by-step guides. When you’re buying your sewing machine, be sure to ask questions about what instruction guide it comes with. You could also look the sewing machine up on YouTube to see if there are any instructional videos available. 

If you’re buying a second-hand machine, please do me a favour and make sure it comes with it’s manual. Although you may be able to google information, and even watch instructional videos on YouTube, the information in the machines manual is super important to have on hand. 

Mechanical VS Computerised 

Sewing machines can be mechanical or computerised. Some people say you should start with a mechanical machine, and others swear by computerised machines. This decision is personal, but to help you out, here is an explanation of the two.

One way to think about it is that mechanical machines are manual, whereas computerised machines are automated. With a mechanical machine, you use dials to choose stitches and change the settings of the machine. Whereas, computerised machines are more advanced and can change between stitches and settings automatically, which can make sewing smoother. Mechanical machines are easier to maintain and simpler to use than computerised machines. However, computerised machines come with a variety of stitches and allow you to create decorative stitches and embroidery. Mechanical machines have fewer stitches and are cheaper to buy than computerised machines. 

I personally started off using my mum’s mechanical machine but transitioned to a computerised machine when I was able to buy my own. I suggest you go with whatever you’re most comfortable using.

Light 

Some sewing machines come with built in lights and others don’t. If your machine doesn’t have a light included, you’ll need to set it up near a lamp or somewhere in really good lighting. A light isn’t a massive issue for me, because I have pretty good eye-sight. However, my mum has poor eye-sight and has to use a lamp and her machine’s in-built light to ensure she can see what she is doing properly. 

Try before you buy 

If possible, visit friends or family with sewing machines to get an idea of the machine you’d like to buy, and the type of features you’d like included in your future machine. Not everyone will be able to do this, but if you can definitely make sure you ask around. Most people will be happy and even excited to tell you all about their machine and help you out. 

Warranty and services

When buying a new sewing machine it’s important to ask questions about the warranty. How long is it? What does it cover? You can probably find this on the website but the shop assistant should be able to help you if you are able to buy your machine in store and not online. It’s worth checking if your machine comes with any services included. Some brands offer services and parts in-line with the warranty, whereas others don’t. 

This is worth considering when you buy a second-hand machine. Second-hand machines are cheaper, but you’re making the decision to disregard warranty. It’s also worth considering how easy (or difficult!) it’s going to be to get spare parts for your second-hand machine. 

Research 

I cannot stress this enough: READ ONLINE REVIEWS BEFORE YOU MAKE A DECISION. Ok, sorry for shouting, but it’s really important to do your research! Don’t get me wrong, this blog post is a great starting point, but you really need to do your own online research, especially when you think you’ve found the perfect machine. This final step is the most important one! 

We hope part 2 of the learn to sew guide has been helpful for you in your journey to sewing. Stay tuned for part 3! 

Happy sewing!

Jess 

Have a picture you want to share or want to be inspired? Make sure to follow our instagram page – Flosstyle Patterns (@flosstyle_patterns) • Instagram photos and videos

Don’t forget to join the facebook group for advice from experienced sewers – www.facebook.com/groups/flosstylefair 

Pin our gorgeous designs on Pinterest – https://www.pinterest.com.au/flosstyle_patterns/

Filed Under: Beginners, Blogs by Jess, Learn to Sew

in Beginners· Blogs by Jess· Learn to Sew

Sewing for Beginners Part 1 – The Tools of the Trade

Have you always wanted to start sewing but not known where to start?

We are here to help you out! Over the coming months, we will be posting a series of blog posts that will help beginners get started sewing. Part one will take a look at the tools and equipment you will need before you can get started sewing. 

Here at Flosstyle, we understand that sewing can be daunting for beginners. We want to help you create your own wonderful creations and have you sewing with confidence like a pro! The first thing a pro needs is a sewing toolkit with the essential tools of the trade. 

Sewing is such a wonderful hobby that sparks creativity and boosts your well being. If you’d like to read more about the benefits of sewing, read our Sewing for mood, mental health and well being post. But for now, let’s get into the tools of the trade!

Sewing machine 
Firstly, and most obviously, you will need a sewing machine. There are so many different sewing machines on the market, so choosing one that is user-friendly for beginners can be intimidating. We suggest doing research and buying a sewing machine that is marketed at beginners to ensure you’re set up for success. Watch this space, in the future we will post a beginners sewing machine buyers guide. A sewing machine is a huge investment to make, and you shouldn’t take it lightly. If you can’t wait for our guide, we suggest joining our facebook group, Flosstyle Fair, full of members who can help you with your decision. 

Scissors
In your sewing kit, you’ll need two pairs of scissors: one for cutting the paper patterns and one for cutting fabric. These are similar to the pair I use.

Pins
A set of pins is essential for all sewers. Pins secure pattern pieces to the fabric to aid in accurate cutting. Pins also secure the pieces of fabric you’ll be sewing together to ensure they are correctly aligned. 

Oh, and don’t forget a cute pin cushion for storage! 

Unpicker / seam ripper 
While you may not think you will need an unpicker, we recommend making sure you have one before you get started sewing: unpicking mistakes is unfortunately inevitable. Thankfully, an unpicker makes relatively easy work of unpicking stitches. 

Thread
As you get more confident and start sewing a variety of items, you’ll want to have a lot of different colours of thread in your kit. Start with whatever colour will match your first project and perhaps a black and white too. Remember some colours will match well with a range of others like the photo below.

Measuring tape
Measuring tape is especially important for taking your own measurements, as well as measurements of the others you are making clothes for. 

Spare sewing machine needles 
While sewing machine needles don’t break too often, it’s a real inconvenience when they do! That’s why we recommend always having spares on hand. 

Chalk / fabric markers
Many of your upcoming projects will require you to make marks on your fabric. Using chalk or fabric markers allow you to do this without staining your fabric. 

Ruler 
As outlined in our How to use PDF sewing patterns blog post, a ruler is essential for ensuring your pattern is the right size (especially important when you’re printing your own PDF patterns at home!). Don’t forget to check out all the PDF patterns we have available in our Flosstyle shop.

You could also use your measuring tape for this, but it’s a lot easier with a clear ruler. 

Sewing box/bag
Now that you have all these tools, you can’t forget about a sewing box to store them all in! There are a bunch of different types of sewing boxes or bags to choose from ranging in price.  

Optional:
These items are not necessary to start your sewing journey, but they may help, and this wouldn’t be a comprehensive toolkit guide without including them. 

Rotary cutter
A rotary cutter is similar to a pizza cutter, but it’s used to cutting fabric… not delicious pizza. Some people find rotary cutters a lot more accurate than fabric scissors. If you decide to opt for a rotary cutter rather than fabric scissors (or, in addition to fabric scissors), you have to make sure you use a cutting mat, otherwise, your sewing bench will be all sorts of cut up.

Spare bobbins
While you can re-thread your bobbin using your sewing machine, some people prefer having spares that are threaded and ready to go (I admit, due to my lazy-ness, I am definitely one of those people!). However, this is very much a personal preference and can depend on the projects you’re undertaking as to whether you need spares on reserve. 

Seam Gauge
A seam gauge allows you to measure small areas of the fabric as you sew. This tool is especially helpful for hems, seam allowances, buttons and pleats. While a seam gauge is incredibly useful, it isn’t essential for all projects, especially more simple projects aimed at beginners. 

Now that you know what you need to get started, it’s time to get shopping! Let us know what you buy for your toolkit in the comments below. Keep an eye out for the next post in this series. 

Happy sewing!

Jess 

Have a picture you want to share or want to be inspired? Make sure to follow our instagram page

Don’t forget to join the facebook group for advice from experienced sewers

Pin our gorgeous designs on Pinterest

Filed Under: Beginners, Blogs by Jess, Learn to Sew Tagged With: beginner sewing, beginners guide to sewing tools, Learn to sew

Primary Sidebar

Recent Posts

  • Sewing for loved ones March 21, 2022
  • Sewing Challenge 2022 – Week 4 January 30, 2022
  • Sewing Challenge 2022 – Week 2 January 15, 2022
  • Scrub Cap Sew Along January 14, 2022
  • Sewing Challenge 2022 – Week 1 January 7, 2022

Categories

  • 2019 52 Week Sewing Challenge
  • 52 Week Sewing Challange
  • 52 Week Sewing Challenge – 2020
  • 52 Week Sewing Challenge – 2022
  • Alice's Tea Set
  • Applique
  • Artiste
  • Arts and Crafts
  • Babys First Toys
  • Bazinga Backpack
  • Beginners
  • Behind the scenes
  • Blogs by Jess
  • Blogs by Olivia
  • Bloomies
  • Bolster Bean Bag
  • Bonnet
  • Boutique and Hybrid Bibs
  • Bunny Bucket
  • Bunny Bucket Crown
  • Capsule Wardrobe
  • Charity Cape
  • Christmas Sewing
  • Costumes
  • EZ Wrap Wallet
  • Flosstyle Patterns
  • Free Downloads
  • Freebies
  • Groovy Guys Wallet
  • Guest Blog Post
  • How To
  • Hunter Shorts
  • Itty Bitty
  • Kanga Carrier
  • Learn to Sew
  • New to PDF Patterns
  • One Yard Tote
  • Paradise Dress
  • Pattern Hack
  • Pattern Release
  • Play Away
  • Printable
  • Puckers
  • Rainbow Hat
  • Scrub Cap
  • Sew Along
  • Sew For kids
  • Sewing
  • Sewing for Baby
  • Sewing for Boys
  • Sewing Groups
  • Sewing with Braden
  • Sewing with Kids
  • Sneak Peek Stocking
  • Souffle Skirt
  • Spring Wardrobe Challenge
  • Sprouts
  • Star Shorts
  • Super Suit
  • Things to do with the Kids
  • Tidy Travel Tote
  • Timelapse
  • Tooshies
  • Trees
  • Trolley Liner
  • TTT
  • Tutorials
  • Twiggies
  • Twigs
  • Ultimate Bucket Hat
  • Uncategorized
  • Upcycle
  • Upcycle Challenge 2018
  • Ventura Lite
  • Video
  • Whirl Skirt
  • Zoo

Footer

Product categories

  • Pattern Workshop
  • Patterns
    • Accessories
    • Babies
    • Baby Carrier
    • Bags
    • Boys
    • Free
    • Gifts and Toys
    • Girls
    • Home Decor
    • Ladies
    • Men
    • Wallets and Bags
  • Uncategorised

New to the Blog

  • Sewing for loved ones
  • Sewing Challenge 2022 – Week 4
  • Sewing Challenge 2022 – Week 2
  • Scrub Cap Sew Along
  • Sewing Challenge 2022 – Week 1

Search

  • About Us
  • Free Patterns
  • Downloads
  • Privacy
  • FAQ’s

Flosstyle Patterns · Copyright © 2023

Copyright © 2023 · Ellie Jane on Genesis Framework · WordPress · Log in