• Skip to primary navigation
  • Skip to main content
  • Skip to primary sidebar
  • Skip to footer
  • Home
  • Blog
  • Shop
  • Cart
  • My Account

Flosstyle

Practical PDF Sewing Patterns

in Beginners· Free Downloads· How To· New to PDF Patterns· One Yard Tote

How to use PDF sewing patterns – everything you need to know to get downloading and sewing!

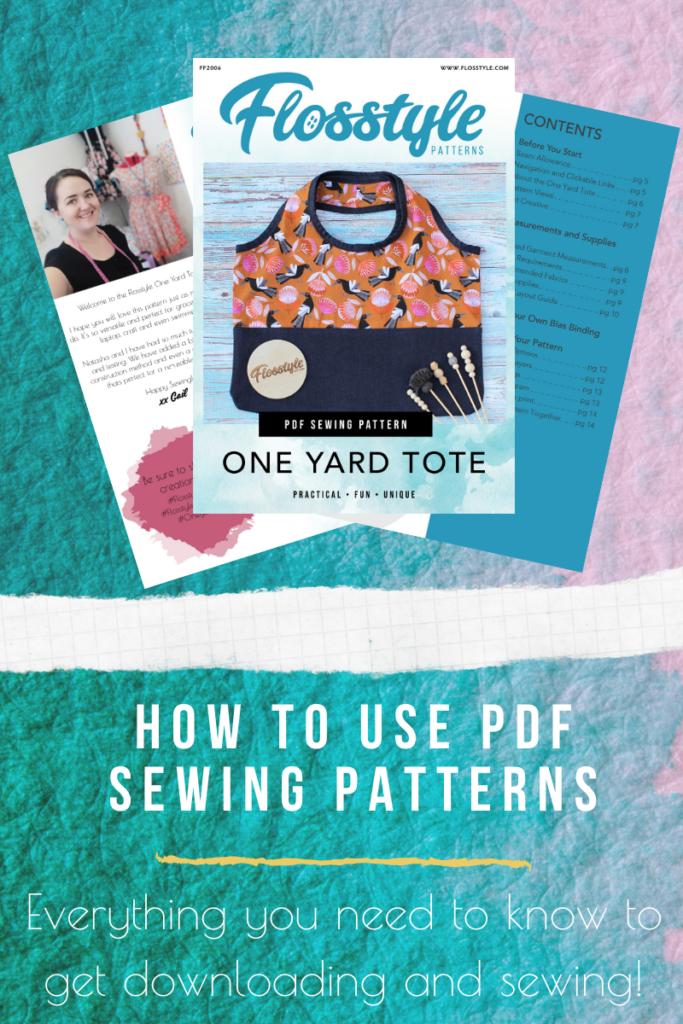
If you’ve always been interested in PDF sewing patterns and wanted to know how to use them, then this is the post for you.

Here at Flosstyle we understand that downloading and using PDF sewing patterns can be daunting for some. We are here to help alleviate your anxieties and to open up a brand new world of PDF sewing patterns to you. Our blogpost “Why you should start using PDF sewing patterns now” is a must read if you’re still not quite convinced or want to learn more about the world of PDF Patterns.

We promise that you don’t have to be tech savvy to find and download amazing and creative PDF sewing patterns. Our step-by-step guide below is super easy to follow and will have you downloading PDF patterns in no time.

Step 1 

The first step to using a PDF pattern is finding the perfect pattern. If you’ve never used a PDF pattern before, we suggest trialing one of our free patterns. This post will demonstrate downloading the One Yard Tote pattern (and it will demonstrate how easy it is!). To fully get your head around PDF patterns, why not follow along with this post and download our One Yard Tote PDF pattern too. 

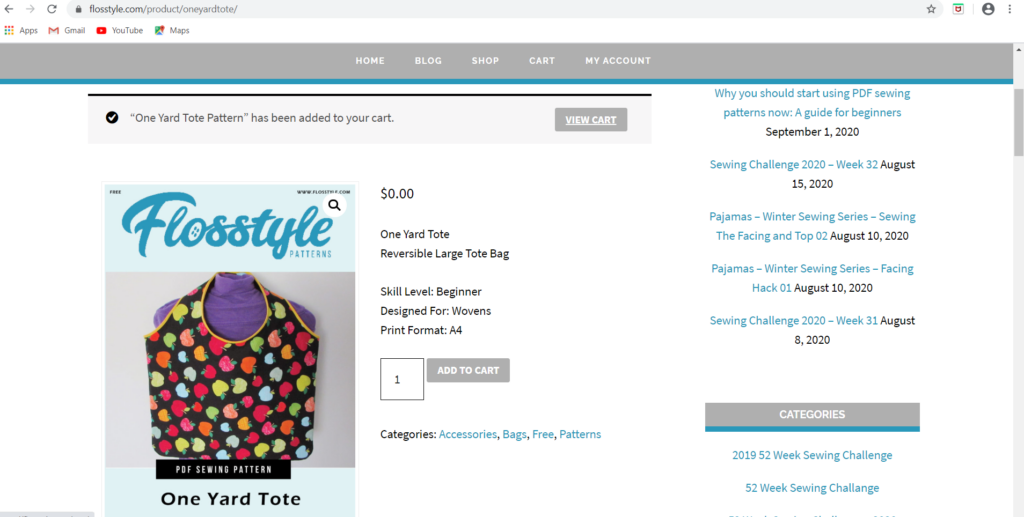
The One Yard Tote is a brilliant first PDF sewing pattern for you to download, assemble and sew. It’s free, it’s cute, and it’s even reversible! The One Yard Tote is perfect for carrying your groceries, books, laptop, craft items and even your swimmers for the beach. This is the perfect bag to accompany you to school, university or work as it’s perfectly sized for A4 folders and documents. All you need to create this versatile and useful bag is one yard of fabric and 2.25m of binding bias (yes that’s seriously it!).

Step 2

The second step is to download the pattern. Click on the image above and you will be linked directly to the one yard tote bag.

All you need to do is click on “add to cart”. Now click on the “view cart” button and you will see your one yard tote bag pattern in your cart. 

Next you will need to fill in some of your details and you will be able to download the pattern. 

Ta-da! The One Yard Tote PDF sewing pattern is now yours!

Step 3

The third step is something that a lot of people forget. Make sure you save your newly downloaded PDF pattern to your computer in a place that will be easy for you to find again in the future. We suggest you make a dedicated folder to save your PDF patterns in. Once you get a collection of patterns, you can create sub-folders for different types of patterns such as “dresses”, “accessories”, “toys”, and more. 

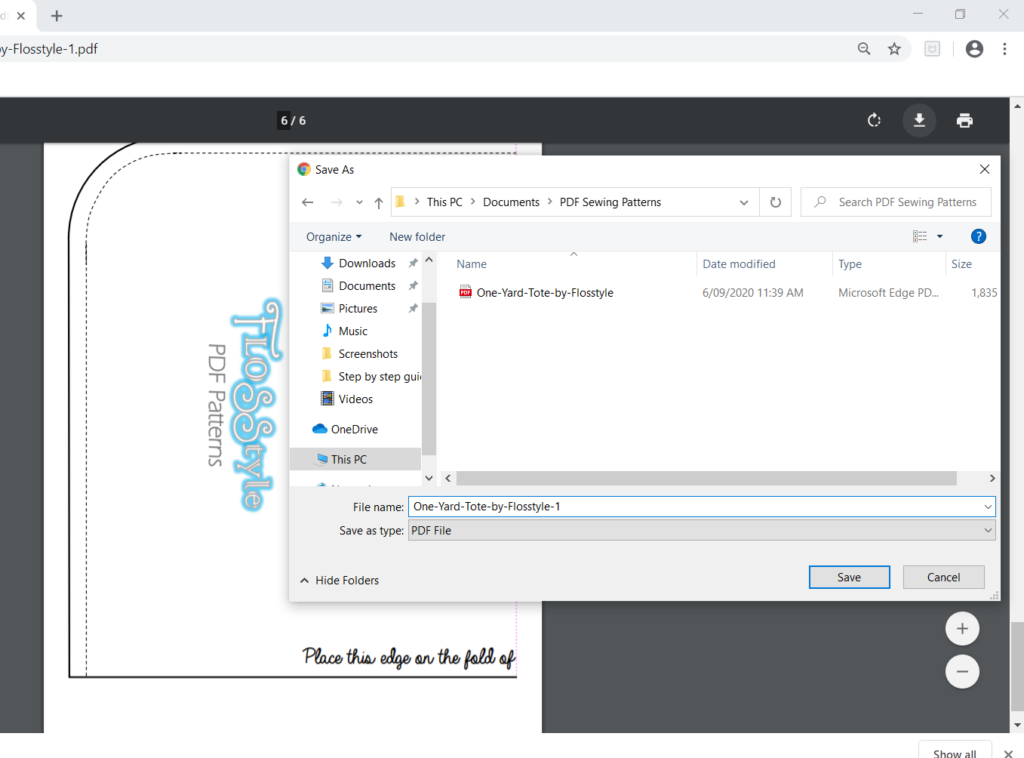
Your downloaded item will be one PDF document. This document will include clear instructions as well as the pattern itself.

Step 4 

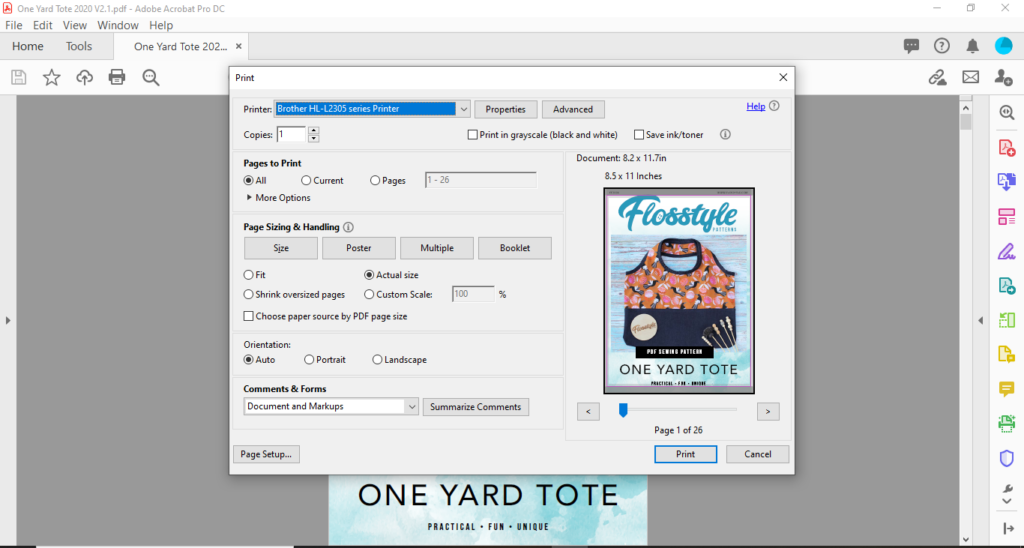
Now that you have the PDF pattern downloaded and saved, the fourth step is to print the pattern. Our patterns provide very direct and specific advice on printing. To ensure your pattern is printed correctly please follow the instructions clearly. The most important rule to follow when printing PDF patterns is NOT to scale the print. Have a look at the image below, to see the settings we used. We kept the scaling option as “actual size”. (Depending on your printer this might also be “default” “no scaling” “100%”)

If you’re running low on ink or paper, you also have the option to print only the necessary pages (e.g. in the One Yard Tote pattern, you only need to print pages 4-6). You can keep the instructions pages open on your computer or ipad while you’re assembling the pattern and sewing.

If you don’t have access to a printer, that’s totally ok! You can ask your local print and copy shop to print off your pattern for a small fee. Officeworks charge around 10 cents for each page of printing. The One Yard Tote is a 6 page PDF, so it could cost you less than a dollar to print.

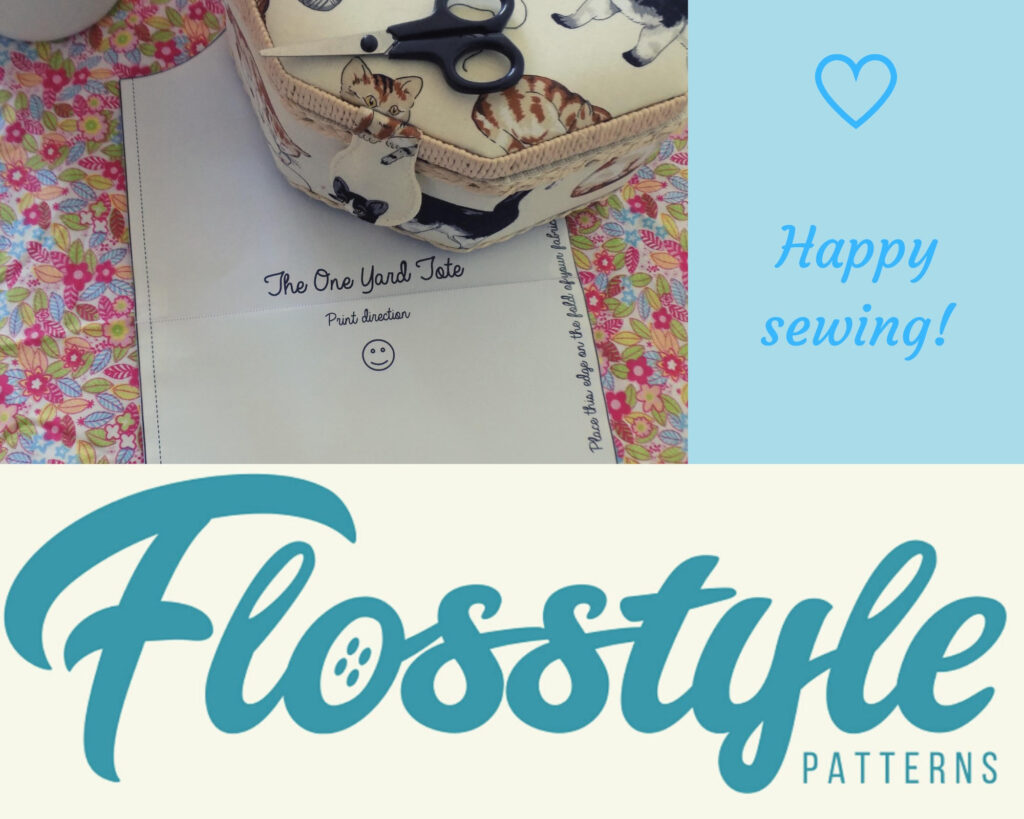
All Flosstyle patterns come with a test page to ensure the pattern has been printed correctly. Please ensure you take the time to measure the test square before you get started on the next step.

Step 5

The fifth step is to assemble the pattern. This is one of my favourite parts of the process. I love to have music playing in the background while I get completely stuck into my project (and yes before you ask, dance breaks are totally encouraged!).  

Cut the pieces out and sticky tape or glue them together. Flosstyle patterns provide clear instruction and direction so you will have no issues with knowing where to cut and where to stick the pages together. 

Step 6 

That’s it! Now it’s time to get sewing. We hope this guide has been useful and helped you feel more confident in your ability to download and assemble a PDF pattern. Don’t forget that one of the best things about PDF patterns is that you can print out as many copies of the pattern you need if you make any mistakes. 

Before you start sewing you might want to check out our One Yard Tote Timelapse Video showing how the tote is sewn together. For inspiration you can find all our blog posts about the One Yard Tote here.

We would love to see your Flosstyle creation! Join our facebook group, Flosstyle Fair and share your creations with us there. Our facebook group has over 8000 members who have a wealth of knowledge on using PDF sewing patterns and would be more than happy to help you out and answer any questions you might have. You can also share your creations on instagram with the hashtag #flosstyleoneyardtote for a chance to be featured on our page.

Happy Downloading and Sewing

Jess

Filed Under: Beginners, Free Downloads, How To, New to PDF Patterns, One Yard Tote Tagged With: How to use PDF Sewing Pattern, Learn to sew, Learn to use PDF Sewing Patterns, PDF Sewing Patterns, Print PDF Pattern

in Capsule Wardrobe· Flosstyle Patterns· How To· Pattern Hack· Sew Along· Sew For kids· Sewing for Baby· Sewing for Boys· Sprouts· Trees· Tutorials· Zoo

Pajamas – Winter Sewing Series – Facing Hack 01

This series will show you how to make snuggly pajamas for your little ones this winter in the Southern Hemisphere!

I’ve been wanting to make my littles winter PJ’s for some time now. Following Laura’s Post on our Facebook Fair Group. I used the Zoo and the Sprouts pattern to make the pj sets.

Lets start with the Zoo PJ Top

Option – Panda top and Wombat tail With Long sleeve add-on
Fabric –
Flannel

For my sons version I ran out of fabric so instead of fully lining the shirt I made facings. It is very easy and heres how I did it.

Step 1 – Take the front Zoo pattern piece and trace the shirt length line and blue line in the size you are making.

Step 2: Using this pattern piece you are going to measure the front snap placket front and use this as the snap placket facing. Width around 2″ or 6cm. (you will cut 2 of the placket facings mirrored)

Step 3: Place on a piece of paper and trace the neckline. width of 2″ for the neckline facing. (You will cut 1 of the back neckline facing)

Voila – Your facing pattern is done. This can be applied to any garment that requires a lining for example a coat, dress bodice etc.

Follow for my next Blogpost on sewing the PJ top together using this facing.

Happy Sewing!

Tash

“IMPORTANT: Most nations have strict regulations surrounding children’s sleepwear – in order to sell it, it must meet certain fire resistant standards, in both fabric content and construction/fit. Please do not sell anything you make from this pattern without first checking to see that you have adhered to those regulations. Even for personal use, it is a good idea to be aware of the standards and choose your fabric/fit accordingly. (snug fit is important if not using flame retardant fabric, per most government regulations)”

Filed Under: Capsule Wardrobe, Flosstyle Patterns, How To, Pattern Hack, Sew Along, Sew For kids, Sewing for Baby, Sewing for Boys, Sprouts, Trees, Tutorials, Zoo Tagged With: facing, free tutorial, hack, pajamas, pj, sprouts, tutorial, winter, zoo

in Arts and Crafts· Behind the scenes· How To

Dog Lino Printing – Step by Step

I have had heaps of questions about how I made these dog pants for Week 8 of the 52 Week Sewing Challenge earlier this year so thought I’d write a more in depth how to. (Find the original blog here.)

I got both the rubber block and the carving tools from Spotlight, I’m not sure how the quality compares to others but they were relatively cheap and I could order online plus they worked well for me.

Parker was very insistent he wanted a dog stamp on his pants so we searched Pinterest for some inspiration and once we found the photo below there was no talking him in to anything else.

I printed the image out in the size of my rubber block and then used tracing paper to trace the image out using a 2B pencil. I then flipped the tracing paper over onto the block so the drawn side was touching the block and used the other end of the pencil to rub the design onto the block.

I then drew over the copied pencil design with a black permanent marker, so it wouldn’t be accidentally rubbed off while I was carving the design out. Below is the printed design and my carved stamp before I started testing it.

I don’t have a proper tool for applying the paint to the rubber tile so I just used a foam brush I already had (like these ones). I tested the design with regular acrylic paint and onto paper and after each print removed any extra areas I wasn’t happy with until I was ready to try on the fabric.

I decided to use a textile medium mixed into acrylic paint so I would have more colour options, because I already have acrylic paints, however you can also buy specific fabric inks and paints. This has held up with washing okay so far.

I decided on the pattern I was going to use, the Star Shorts in the Hunter version and traced my pattern pieces onto the fabric so I would be able to line up my prints exactly where I wanted them.

I reapplied paint between each print for one pair and alternated with the second pair for a different look. If you have any questions I would be more than happy to answer them in our Flosstyle Fair group on Facebook.

Happy Sewing
xx Gail

Filed Under: Arts and Crafts, Behind the scenes, How To Tagged With: Hand Carved Stamp, Hand Stamped Fabric, Lino Printing How To

Primary Sidebar

Recent Posts

  • Sewing for loved ones March 21, 2022
  • Sewing Challenge 2022 – Week 4 January 30, 2022
  • Sewing Challenge 2022 – Week 2 January 15, 2022
  • Scrub Cap Sew Along January 14, 2022
  • Sewing Challenge 2022 – Week 1 January 7, 2022

Categories

  • 2019 52 Week Sewing Challenge
  • 52 Week Sewing Challange
  • 52 Week Sewing Challenge – 2020
  • 52 Week Sewing Challenge – 2022
  • Alice's Tea Set
  • Applique
  • Artiste
  • Arts and Crafts
  • Babys First Toys
  • Bazinga Backpack
  • Beginners
  • Behind the scenes
  • Blogs by Jess
  • Blogs by Olivia
  • Bloomies
  • Bolster Bean Bag
  • Bonnet
  • Boutique and Hybrid Bibs
  • Bunny Bucket
  • Bunny Bucket Crown
  • Capsule Wardrobe
  • Charity Cape
  • Christmas Sewing
  • Costumes
  • EZ Wrap Wallet
  • Flosstyle Patterns
  • Free Downloads
  • Freebies
  • Groovy Guys Wallet
  • Guest Blog Post
  • How To
  • Hunter Shorts
  • Itty Bitty
  • Kanga Carrier
  • Learn to Sew
  • New to PDF Patterns
  • One Yard Tote
  • Paradise Dress
  • Pattern Hack
  • Pattern Release
  • Play Away
  • Printable
  • Puckers
  • Rainbow Hat
  • Scrub Cap
  • Sew Along
  • Sew For kids
  • Sewing
  • Sewing for Baby
  • Sewing for Boys
  • Sewing Groups
  • Sewing with Braden
  • Sewing with Kids
  • Sneak Peek Stocking
  • Souffle Skirt
  • Spring Wardrobe Challenge
  • Sprouts
  • Star Shorts
  • Super Suit
  • Things to do with the Kids
  • Tidy Travel Tote
  • Timelapse
  • Tooshies
  • Trees
  • Trolley Liner
  • TTT
  • Tutorials
  • Twiggies
  • Twigs
  • Ultimate Bucket Hat
  • Uncategorized
  • Upcycle
  • Upcycle Challenge 2018
  • Ventura Lite
  • Video
  • Whirl Skirt
  • Zoo

Footer

Product categories

  • Pattern Workshop
  • Patterns
    • Accessories
    • Babies
    • Baby Carrier
    • Bags
    • Boys
    • Free
    • Gifts and Toys
    • Girls
    • Home Decor
    • Ladies
    • Men
    • Wallets and Bags
  • Uncategorised

New to the Blog

  • Sewing for loved ones
  • Sewing Challenge 2022 – Week 4
  • Sewing Challenge 2022 – Week 2
  • Scrub Cap Sew Along
  • Sewing Challenge 2022 – Week 1

Search

  • About Us
  • Free Patterns
  • Downloads
  • Privacy
  • FAQ’s

Flosstyle Patterns · Copyright © 2023

Copyright © 2023 · Ellie Jane on Genesis Framework · WordPress · Log in