• Skip to primary navigation
  • Skip to main content
  • Skip to primary sidebar
  • Skip to footer
  • Home
  • Blog
  • Shop
  • Cart
  • My Account

Flosstyle

Practical PDF Sewing Patterns

in Arts and Crafts· Beginners· Behind the scenes· Guest Blog Post· Sewing

That time I tested the W-Under Woman cloth pad pattern

The weather outside is frightful (hmmm, kinda), but the fire is so delightful (yeah, no, definitely not fire weather this side of the equator), and since we’ve no place to go (thanks corona), let us sew let us sew let us sew ?

What better way to get into the swing of celebrating the festive season than with some uber festive cloth pads (the red dawn doesn’t care what season it is so might as well be prepared) :b

Pretty much started out like any other testing pattern day…send file to the Husbander for him to print; instructions gets printed; Husbander gives me the printouts; put printouts down somewhere; survey fabric options; decide that I’m ready to begin; struggle to remember where printouts are; hunt entire house for printouts; find printouts; start reading through printouts; realize it’s missing the pattern pieces; ask Husbander to print pattern pieces; pattern pieces printed; move sewing projects, random toys & other things that have now magically appeared in the 10minutes I was away from my sewing space; take a deep breath, ok I think we’re ready.

I took the instruction’s advice (make sure to read through the instructions more than once) & measured (more like eyeballed) one of my current cloth pads so that the ones I’m making can be similar in size (plus it gives me a visual for construction). After umming & aaahing for a bit I settled on the 2.75” pattern pieces at a 10”inch length, & I’ll be attempting the 3 different core options (exposed, visible, & hidden), because I like being extra like that.

Cut out pattern pieces, added tape, making sure everything has been connected with the precision of advanced OCD…easy peesy lemon squeezy. 

Cotton woven top, bamboo/cotton fleecy fabrics underneath

Delve into the depths of my fabric containers for suitable fabrics, message your sewing person to double check you’re using the correct fabrics, delve back into the depths because that piece of fleece you spotted before will come in handy & let the cutting begin! 

Honestly out of the whole process I think the cutting & tracing was the most difficult part (thank goodness) although truth be told I’m probably using the wrong thread, most definitely the wrong needle, the fabric is also questionable, but honestly I’m ploughing through a lot of fears here & it actually feels great so might as well give all the different stitches a try (I don’t think I’ve ever used an overcast stitch…where have you been all my life!!! And it actually came out looking pretty good). 

So after all the stressing & worrying about making mistakes, wondering if they’ll look any good, hoping my machine doesn’t give me a mini heart attack when a needle breaks (no needles were harmed in the making of these cloth pads- hooray! Don’t forget channeling stitches & pressing seams are your friends) I think these came out pretty marvelous & best of all, no-one died! Can’t wait to give these festivenessnessnessnesses a try. Hope you’ll attempt them too!

Happy Sewing!

V

Not too shabby

Filed Under: Arts and Crafts, Beginners, Behind the scenes, Guest Blog Post, Sewing Tagged With: Cloth pad, cloth pad pattern, Flosstyle, Flosstyle Patterns, sew, sewing, sewing makes me happy, W-under woman

in Flosstyle Patterns· Groovy Guys Wallet· Guest Blog Post· Pattern Hack· Tutorials

Groovy Guys Wallet – Leather and Custom Decal Hack

Hi everyone! I’m Sara from The MODERN Maker at Cobb’s Mill and will be sharing a tutorial for utilizing leather and heat transfer vinyl (HTV) to create the Groovy Guys Wallet. I love this pattern for the men in life! Everyone, old and young, need wallets and this pattern creates a wonderful unique gift!

You will need the materials below to get started:

For the wallet:

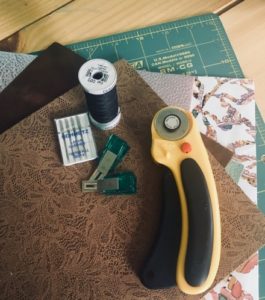
  • 2-4 8×10 sheets of leather. I purchased my leather here.
  • Leather needle
  • Wonder clips or similar
  • Rotary cutter and mat
  • Thread
  • Sewing machine

For the HTV design:

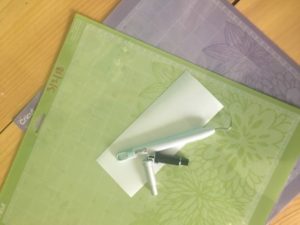
  • Cutting machine of choice
  • HTV, I used Sisar EasyWeed
  • Weeding tool
  • Blades for cutting HTV and leather (optional)
  • Cutting mats, standard for HTV, strong grip for leather (optional)

I began by creating a cut file in Design Space because I plan to make this wallet frequently and I prefer the accurate cuts from my Cricut Maker. (I’m always a bit crooked with a rotary cutter and even an edge is important with leather!)

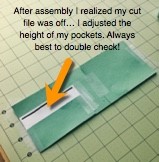
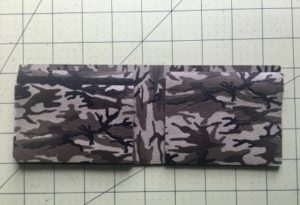
I sized the pattern down a bit because I wanted to give this wallet to my son for his 7th birthday and I wanted the wallet to fit nicely in his jeans. To ensure I was happy with the size, I cut the pattern on paper and assembled it with tape on my cutting mat. This is also helpful when working with pattern pieces that can be confusing… such as multiple similar sized squares of leather! It really helps me to keep it all straight.

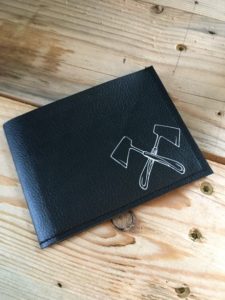
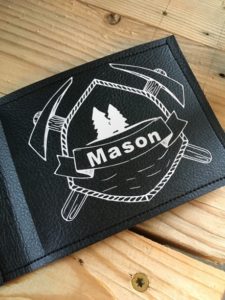
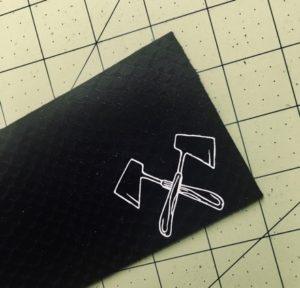
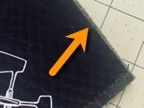
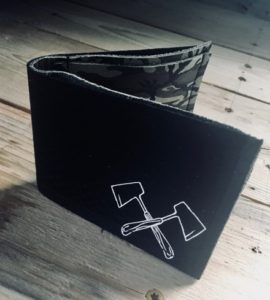
If you would like to add HTV to your wallet now is the time to do so. I adapted a file from Scout and Rose Designs to create a simplified ax for the wallet facing. I opted not to include the crest on the inside because of the fun camo leather. These designs are perfect for the boys in my life because my husband is a sawyer. Feel free to add your own “stamp”!

I adhered the HTV to the wallet facing using a heat press set to 305 degrees for 5 seconds. You could also adhere with an iron without steam. Press all your designs on prior to stitching.

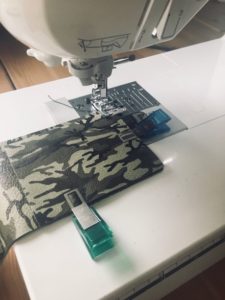
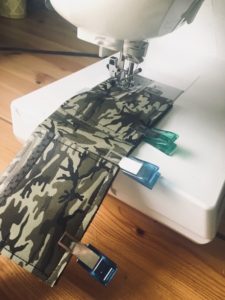
Next, assemble the lining and pockets. Clip with wonder clips or similar. Do not use pins as they will leave a permanent hole in the leather. Take care to ensure edges are even.

Stitch ¼” around three sides of the right pocket and stack of left pockets (stitching all layers at once). I found starting fully on the fabric with a 3.5mm stitch length and utilizing 1-2 backstitches worked well on my machine. If backstitching, pull your threads 2-3 inches from the needle plate prior to stitching to keep the stitches clean on the wrong side. I STRONGLY recommend testing 4-5 layers of stacked leather prior to stitching to ensure you are happy with the results as stitching will leave permanent holes in the leather.

Using a rotary cutter trim any edges that slipped during the stitching. We will be leaving all edges unfinished (unbinded) so it is important to keep the edges straight and clean.

Lay the front facing, wrong sides together, with the lining. Verify the HTV decal is facing in the correct direction. Stitch ¼” around three sides of the facing leaving the open. Trim as needed.

Press the wallet closed using a heat press or iron.

Voila! You have created a beautiful leather wallet!

Happy Stitching,
Sara Cobb
Owner, The Modern Maker at Cobb’s Mill

Filed Under: Flosstyle Patterns, Groovy Guys Wallet, Guest Blog Post, Pattern Hack, Tutorials Tagged With: guys wallet, leather, pattern, pdf, sewing, wallet

Primary Sidebar

Recent Posts

  • Sewing for loved ones March 21, 2022
  • Sewing Challenge 2022 – Week 4 January 30, 2022
  • Sewing Challenge 2022 – Week 2 January 15, 2022
  • Scrub Cap Sew Along January 14, 2022
  • Sewing Challenge 2022 – Week 1 January 7, 2022

Categories

  • 2019 52 Week Sewing Challenge
  • 52 Week Sewing Challange
  • 52 Week Sewing Challenge – 2020
  • 52 Week Sewing Challenge – 2022
  • Alice's Tea Set
  • Applique
  • Artiste
  • Arts and Crafts
  • Babys First Toys
  • Bazinga Backpack
  • Beginners
  • Behind the scenes
  • Blogs by Jess
  • Blogs by Olivia
  • Bloomies
  • Bolster Bean Bag
  • Bonnet
  • Boutique and Hybrid Bibs
  • Bunny Bucket
  • Bunny Bucket Crown
  • Capsule Wardrobe
  • Charity Cape
  • Christmas Sewing
  • Costumes
  • EZ Wrap Wallet
  • Flosstyle Patterns
  • Free Downloads
  • Freebies
  • Groovy Guys Wallet
  • Guest Blog Post
  • How To
  • Hunter Shorts
  • Itty Bitty
  • Kanga Carrier
  • Learn to Sew
  • New to PDF Patterns
  • One Yard Tote
  • Paradise Dress
  • Pattern Hack
  • Pattern Release
  • Play Away
  • Printable
  • Puckers
  • Rainbow Hat
  • Scrub Cap
  • Sew Along
  • Sew For kids
  • Sewing
  • Sewing for Baby
  • Sewing for Boys
  • Sewing Groups
  • Sewing with Braden
  • Sewing with Kids
  • Sneak Peek Stocking
  • Souffle Skirt
  • Spring Wardrobe Challenge
  • Sprouts
  • Star Shorts
  • Super Suit
  • Things to do with the Kids
  • Tidy Travel Tote
  • Timelapse
  • Tooshies
  • Trees
  • Trolley Liner
  • TTT
  • Tutorials
  • Twiggies
  • Twigs
  • Ultimate Bucket Hat
  • Uncategorized
  • Upcycle
  • Upcycle Challenge 2018
  • Ventura Lite
  • Video
  • Whirl Skirt
  • Zoo

Footer

Product categories

  • Pattern Workshop
  • Patterns
    • Accessories
    • Babies
    • Baby Carrier
    • Bags
    • Boys
    • Free
    • Gifts and Toys
    • Girls
    • Home Decor
    • Ladies
    • Men
    • Wallets and Bags
  • Uncategorised

New to the Blog

  • Sewing for loved ones
  • Sewing Challenge 2022 – Week 4
  • Sewing Challenge 2022 – Week 2
  • Scrub Cap Sew Along
  • Sewing Challenge 2022 – Week 1

Search

  • About Us
  • Free Patterns
  • Downloads
  • Privacy
  • FAQ’s

Flosstyle Patterns · Copyright © 2025

Copyright © 2025 · Ellie Jane on Genesis Framework · WordPress · Log in